Showing posts with label Christmas trees. Show all posts

Tuesday, December 13, 2011

Rustic Country Tree


If you read my last post about my mantel, you got a sneak peak at the Christmas tree. As we've done in the past, we put a big family tree down in the family room, but upstairs in the living room, I get my very own smaller tree to decorate. This makes me very happy.


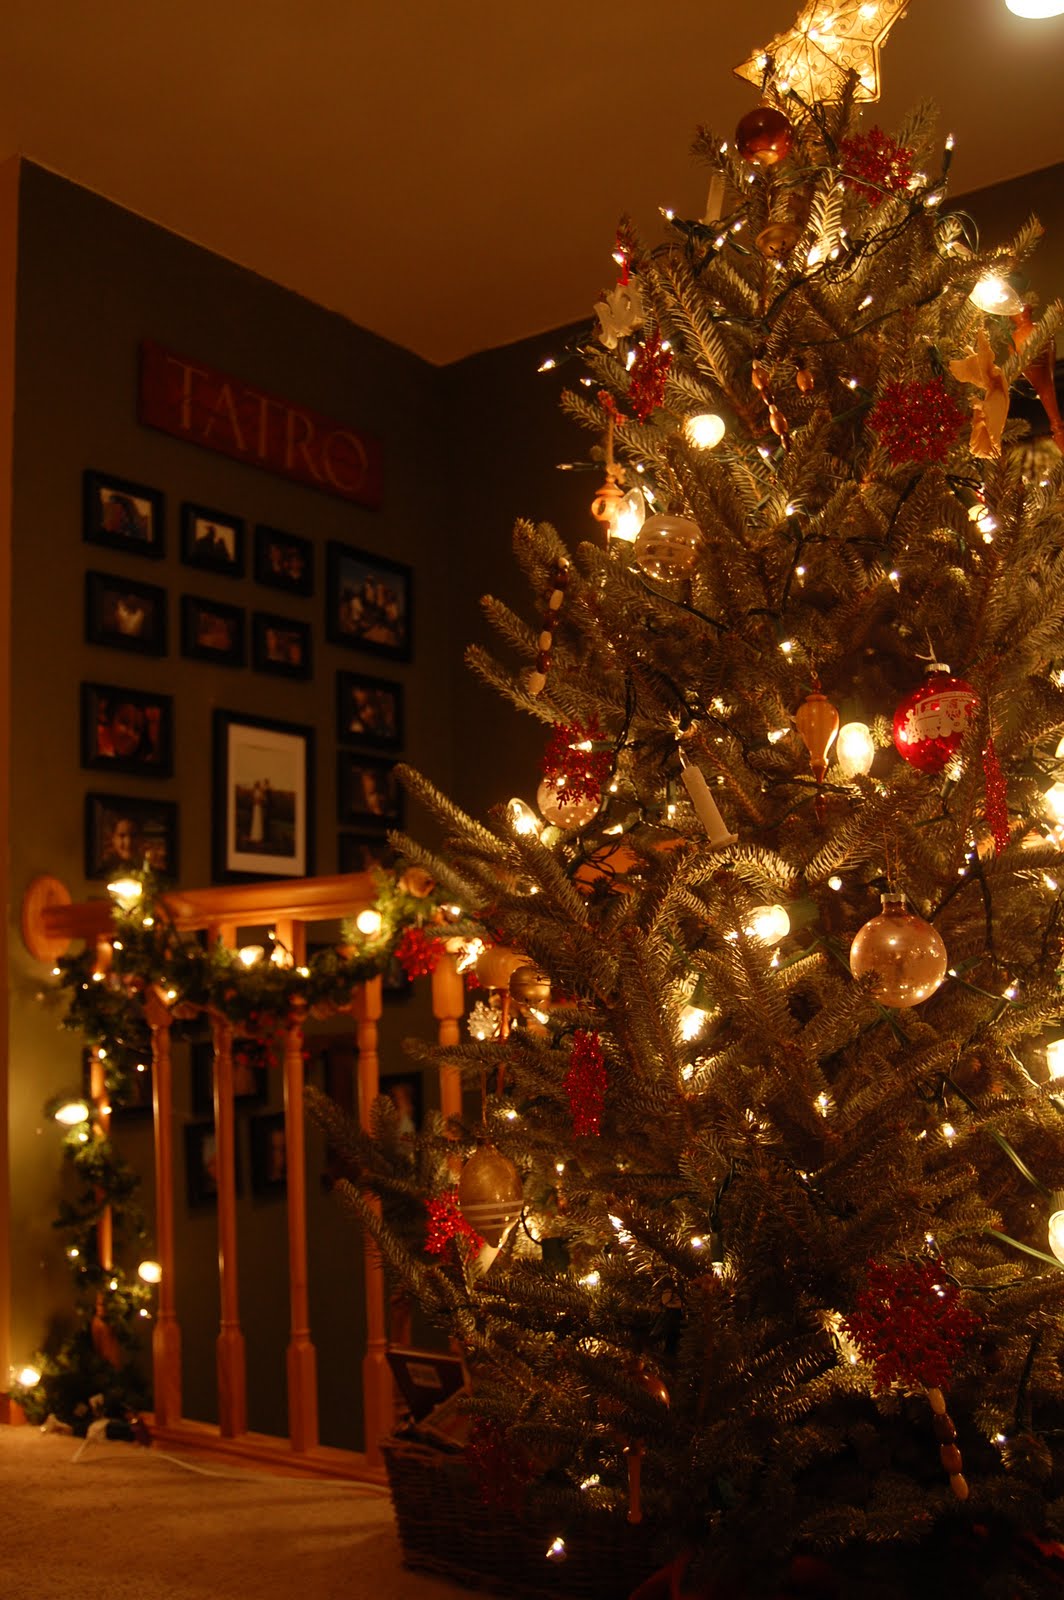
I've never been great at decorating a Christmas tree, but it's fun to play around with it anyway. I always do all white lights on the tree but this year I kept it very simple. In the past I have used the regular small white lights, a string of clear C9 lights, the rattan ball lights, and some faux candle lights. This year you will only see small white lights and the rattan balls. I love the rustic, natural element the balls add.


I put the wooden, handmade ornaments that Lincoln's step-dad has made us on this tree.


These are such a treasure to us! They are absolutely stunning. I also put on the wooden bead candycanes we made last year,


as well as the vintage/antique ornaments I have collected.


There are a few pops of red here and there, and just a few other ornaments and berry picks.

For a tree skirt, I just wrapped a large piece of plaid fabric around the base of the tree. (This is the same fabric that I used on my table decor.)

I love my antique wooden crate, and with its red letters and rustic feel it is perfect for holding our collection of Christmas books under the tree. Tucked behind/on it is the little wooden sled I found at Goodwill a couple years ago. When I found it, it was 1980s country blue and I think there may have even been a goose painted on it. A new paint job, some sanding, a new jute twine pull rope, and a few pinecones have really brought it into this decade...and century!


The whole she-bang is backed by my old screen door, the perfect backdrop. And the tree is topped by my (new) old rusty star.


I LOVE it! And I love to stand in the kitchen and look over to the living room. So cozy and inviting!


I can't seem to get the pretty button below to work, but I'm linking up to the Christmas Tree Party at Thrifty Decor Chick.


Thursday, December 16, 2010

Living Room Tree


How do people keep up with blogging during the holiday season? I missed the Christmas tree party over at Thrifty Decor Chick, but still wanted to share my tree. So here goes.

We had an absolutely gorgeous day for tree-getting. Seriously, we couldn't have asked for more perfect weather. It was warm, with a light snow falling and sunshine weakly shining through, just enough to create a warm glow.

We traipsed out to the back portion of the tree farm and searched carefully for the perfect tree, shaking showers of snow from evergreen boughs.


We finally settled on a full, medium height tree for the family room, and a small, narrow but full tree for the living room.


We were able to catch a ride back to the barn on the hay wagon.


We enjoyed (free!) hot chocolate in the barn while the workers sent our trees through the shaker and binder. Lincoln and I secured them to the top of our car and we merrily toted them home.

The family room tree is the one we decorate together. This one gets colored lights, (we bought new LED lights for it this year and we LOVE them), and all the ornaments collected over the years. There are ornaments that I made as a kid, ornaments my kids have made, ornaments I purchased at the Dollar Store before I was married, and colorful, rustic ornaments we've collected as a family.

The living room tree is mine to decorate. I start with all white lights. This tree gets regular small lights, a couple strings of C9 white lights, and a couple strings of candle lights that I found at Goodwill several years ago. On this tree I put some antique ornaments I purchased at an antique store this year on our anniversary trip. ( I tried to stick with colors that were similar, but I couldn't resist the train one, knowing Jesse would love it.)


I also put our glitzier ornaments here that fall into the gold, crystal, shiny, category.

I placed the Symbols of Christmas ornaments on this tree, too.


I like to juxtapose glittery ornaments with rustic, which is how these wooden bead candy canes we made this year ended up on this tree.


Plus, they look great with our set of wooden ornaments that Lincoln's step-father has made for us. For a while he was making a new one for us every year.


The whole look gets set off with some red, glittery snowflakes I bought at Walmart last year. I just can't resist throwing in some red. Plus, it helps tie in the train ornament. The base gets wrapped in red burlap.

The cat finds it cozy.

And in the same room, the piano "mantle".


*Disclaimer: Will I ever gain the patience to hide my lights cords better? This is obviously not my forte.

***Looks like I'm not too late. This is the last day!
I can't get the button to work, but here's the link to the Christmas Tree Party!

Wednesday, December 8, 2010

A Christmas Craft


I mentioned these cone trees in my last post, but I thought I'd talk about them in a little more detail here. I did not create a tutorial, but I can tell you exactly what i did.


First of all, as I mentioned before, when I went to the craft store I was surprised at how much the styrofoam cones, that are generally used as a base, cost. Knowing I wanted to make at least three, but not wanting to spend a lot of money, I went home from the craft store empty handed and racking my brain for an idea for the base that would cost me little or no money. I thought about it for a few days until I found myself in Dollar Tree. I was scooping up items I wanted for crafting when I came across the posterboard. Finally the lightbulb went on. 2 large pieces of posterboard for $1. That's more my price range. I brought them home and just cut and folded into a cone shape. I made all three from one piece of posterboard. (If I ever find a spare moment, I'll probably make more with the other piece.) I just stapled and masking taped the seams and I had three cones in varying sizes.


Next, I wrapped them in yarn. The first one took me forever because I started at the base and worked up toward the tip. I had to hot-glue every single bit of the yarn down. On the other two, I was wiser and started at the tip. It holds together better as you go, and then I just glued a little section every couple of inches.

I added the wire stars on top. I used needle-nose pliers to bend it into the star shape. I left a couple of inches of wire as a stem, then stuck the stem down in the tip of the cone shape, attaching with a dollop of hot glue. The wire I used is very heavy-duty and stiff. I got it at the hardware store. I think it's called rebar wire? I got about a million yards of it for $3-4. I will never have to buy more. Ever. I couldn't find a more pliable craft wire in a gauge I liked or for a price i liked. I've used this on a couple crafts and I've been happy with it, but i know there will probably be something I'll make that I'll wish it was more pliable.


I embellished with twine I had on hand, and a berry sprig I got at Hobby Lobby a while ago for $.50.

I love that they are rustic and cozy. I have always loved the idea of decorating with yarn, and this year I've kind of run with it.